Showing posts with label Recipe. Show all posts

Monday, 6 June 2016

Recipe: Lemon & Coconut Slice

Lemon and Coconut Slice

I had the loveliest cake in Starbucks the other week. It was a lemon and coconut slice; a thin pastry-ish biscuit base topped with lemon curd and a layer of coconutty ooh. As I sat there eating it I was trying to think if I'd ever had a lemon and coconut baked good before and I honestly could not recall one. Like some kind of cake addict I went in to Starbucks again this weekend, with the sole intention of grabbing a piece of the lemon and coconut slice, but they had none. It was 'limited edition' apparently. Whatever.

A quick Google told me that lemon and coconut slice seems to be an Australian thing. Well done, Australians - I salute your wondrous cake-making skills! A lot of the recipes I found were for no-bake slices made with condensed milk but none of them seemed to have the base bit. I eventually found a couple of baked ones and I kind of melded the recipes together. The measurements were all in cups so I've converted them to good old metric which should make life a bit easier. Well, it does for me. (Cup measurements annoy me, you see.) The resulting cake has a sightly different base to the Starbucks one but it doesn't matter because it's flipping delicious.

Before I list the ingredients and give you the recipe, yes I'm aware this contains a fair amount of sugar. I know that sugar is considered heinous and toxic these days but nobody is suggesting that you make cakes every single day and eat them for breakfast, lunch and dinner. Michaela Strachan would not be happy with this recipe (she had a benny about The Great British Bake Off last week) but that's fine because I'm not inviting Michaela Strachan round for tea and cake any time soon. Or ever, actually.

If you're feeling fancy you could make your own lemon curd for this recipe but I just used the stuff in a jar from the shop.

Lemon & Coconut Slice

Ingredients


For the base

125g unsalted butter
160g caster sugar
220g self raising flour
1 large free range egg, beaten
Lemon curd

For the coconut topping

125g dessicated coconut
160g caster sugar
1 large free range egg white

Method

Preheat your oven to 180°C (160°C for fan assisted ovens) or gas mark 4. Line a 20cm x 20cm tin with baking paper.

Base: Melt the butter in a saucepan. In a bowl, combine the sifted flour and the caster sugar. Add the melted butter and mix. Add the beaten egg and mix again. You'll end up with a fudge-like loose dough. Tip it into the lined tin and press down and level. You can use the back of a spoon or a spatula but I found it easier to use my (clean) hands. Bake the base in the oven for 15 to 20 minutes or until it is a light golden brown.

Topping: In a clean bowl, lightly beat the egg white with a whisk until it is thick and foamy. You're not making a meringue here so you're not looking for glossy stiff peaks of egg white; just whisk it until it is like dense, lathery soap. Add the dessicated coconut and caster sugar and stir it all together with a metal spoon. You should end up with a kind of crumbly mixture.

Spread the cake base with lemon curd. Two or three tablespoons of lemon curd should do the job but use as much as you fancy. Sprinkle the coconut mixture over the top. Again, I used my hands and kind of crumbled it on all over. You don't need to press it down; just make sure there's a nice even covering.

Return the tin to the oven and bake for a further 10 to 15 minutes or until the coconut topping is golden brown. Leave to cool in the tin (are there three more annoying words in baking than "leave to cool"?) and then remove the slice from the tin and cut it into as many squares or bars as you like.

I guess you could use whatever flavour jam or curd you fancy. I think raspberry or cherry would be very lovely but there's something ever so summery about the lemon and coconut combination.

Happy baking!

Monday, 24 December 2012

Recipe: Stollen

Freshly baked stollen

Do you know, I've not baked or eaten a single mince pie this year. But this morning I baked a delicious stollen and by FLIP it is lush!

I used a mish-mash of several recipes and I heartily recommend a slice of this delicious cakey-bread with a cup of tea and a lovely Christmas film; I opted for A Muppet Christmas Carol.

Freshly baked stollen

Stollen

Ingredients

100ml milk
1 x 7g sachet of dried yeast
Good pinch of salt
1 teaspoon caster sugar
225g strong white bread flour
1 teaspoon mixed spice
1 teaspoon vanilla extract
200g mixed dried fruit*
25g flaked almonds
50g unsalted butter
1 free range egg
250g marzipan

*I used a mix of sultanas, currants, raisins, dried cranberries, candied peel and quartered glace cherries

To finish:

25g melted unsalted butter
40g icing sugar


Method

Gently heat the milk and 50g butter in a saucepan.

Mix the dried fruit together with the vanilla extract and the mixed spice.

In a large bowl mix the flour, yeast, salt and sugar and make a well in the centre. 

Your milk and butter mixture should be warm but not hot. You should be able to hold your finger in it comfortably. When it is at this point crack the egg into the milk and butter and beat well with a fork.

Add your milk, butter and egg mixture to your flour mixture and stir to combine. Add your dried fruit, vanilla and spice mix and combine everything thoroughly. If you've got a swanky electric mixer you can do all this mixing with a dough hook. If you haven't, use a spoon and your hands like I do.

Turn your mixture out onto a well-floured surface and knead it well for about ten minutes. Yes, it is sticky. Yes, you will need to add more flour to stop the dough sticking to the kitchen. Yes, you will get messy hands but heck, enjoy it and have fun!

Transfer your dough to an oiled bowl and cover with clingfilm. Put the bowl in a warm place (an airing cupboard or your oven on the defrost setting is good) and leave to prove until the dough has doubled in size. This can take anywhere from forty-five minutes to an hour and a half.

When the dough is all puffed up, knock it back (squish and knead the air out of it) and then turn it out onto a floured surface. Using a floured rolling pin, roll out the dough to a rough rectangle shape about 9 inches by 7 inches.

Roll your marzipan into a sausage slightly shorter than the long side of your dough rectangle. Dust the work surface with icing sugar whilst you shape the marzipan.

Place your marzipan sausage on the dough and fold the dough over it and seal the ends and the long edge by dampening them with a little water and squidging them together.

Put your stollen, seam side down, on a baking-paper-lined baking tray and gently pat back into shape if needs be. Cover the stollen with oiled clingflim.

Leave it to prove again for about thirty minutes. You don't want it to double in size but you want it to puff up a bit.

Heat your oven to 180°C (160°C for fan ovens) and then bake your stollen for about 25 to 30 minutes or until it is golden brown.

Remove from the oven and transfer to a cooling rack.

Whilst the stollen is still hot, brush it with the 25g of melted butter and then immediately sift the icing sugar over the top.

Leave to cool (but for quality control purposes do try a slice whilst it is still warm and the marzipan is all oozy) and serve sliced.

Best eaten by the twinkling light of the Christmas tree.

Saturday, 1 December 2012

Recipe: Vanilla Chai Biscuits

Vanilla Chai Biscuits

I got my bake on today and I decided that I wanted to capture the spicy flavours of vanilla chai tea in a buttery, crumbly biscuit. I'm really pleased with the results and I thought I'd share my recipe with you in case you fancy trying them too.


Vanilla Chai Biscuits
Makes 30

Ingredients

225g unsalted butter (room temperature)
110g caster sugar
275g plain flour
1 vanilla pod
1 ½ teaspoons vanilla extract
1 ½ teaspoons ground cinnamon
1 teaspoon ground ginger
1 teaspoon ground cardamom
¼ teaspoon ground cloves


Method

Preheat the oven to 170°C (150°C if using a fan oven) or gas mark 3.

Cream the butter until smooth. Add the sugar and beat until light and fluffy.

Sift in the flour and the spices. Split open the vanilla pod and scrape out the seeds and add these to the mix too, along with the vanilla extract.

Mix well.

Roll tablespoons of the mixture into balls (about the size of a walnut) and place on a baking tray lined with baking paper. Make sure you leave room for the biscuits to spread as they cook. Using a fork, slightly flatten the balls of dough.

Bake in batches for 15 to 18 minutes. Oven times will vary so make sure you check them. You want them to be golden at the edges. 

Remove the biscuits from the oven and leave to stand for a couple of minutes before transferring to a wire rack to cool.


Notes

You can buy ground cardamom but I only had cardamom pods in stock so I removed the seeds from their green casing and ground them with a pestle and mortar.

I use the tablespoon from my measuring spoon set to ensure consistent biscuit size.

Twinings Vanilla Chai Tea

The inspiration for these biscuits was Twinings Vanilla Chai tea. It comes in a beautiful Christmassy caddy and it tastes divine. The mix of festive spices with the creamy vanilla is just utter yum. (And no, I'm not being sponsored by them to say this; it is just a very lovely beverage.)

Happy baking!

Wednesday, 28 December 2011

Recipe: Cranberry & Orange Cookies

Cranberry and Orange cookies

I had an orange and some dried cranberries left over from Christmas cookery stuff and I wanted to turn them into some biscuits but I couldn't find a cranberry and orange biscuit recipe that I liked so I got my Joliver on and I made up my own.  I'm really pleased with how they've turned out so I made a note of my recipe and I thought I'd share it with you lot too.


Cranberry & Orange Cookies
Makes about 16-20

Ingredients

110g softened unsalted butter
100g caster sugar (I used golden caster sugar)
50g soft dark brown sugar
150g plain flour
1/2 beaten large free range egg
100g dried cranberries
Zest and juice of one orange
1/4 teaspoon vanilla extract
1/4 teaspoon bicarbonate of soda
1/4 teaspoon salt

Method

In a large bowl mix the softened butter and sugars with an electric whisk until creamy and fluffy.  Add the egg and vanilla extract and mix in.

Add one teaspoon of grated orange zest and two tablespoons of the orange juice and mix again.

Stir in the flour, bicarbonate of soda and salt.  The mixture will be quite thick so you might need to switch from the electric whisk to a wooden spoon at this point.

Add the cranberries and make sure they're mixed in really well and are evenly distributed.

Roll heaped teaspoons of the cookie mix into balls and place onto a baking paper-lined baking tray.  I put about six biscuits on one tray.  You need to space them well as they do spread.

Bake in the oven at 180°C (160°C for fan ovens) for about twelve to fifteen minutes until the edges are golden. Remove cookies from the oven and allow to cool for five minutes before transferring them to a wire cooling rack.

The cookies will crisp up as they cool but they should have a nice soft, chewy centre.

Merry baking!

Thursday, 24 February 2011

Apple & Cinnamon Flapjacks

Homemade apple and cinnamon flapjacks
This week my Graze box contained some gorgeous apple and cinnamon flapjacks.  In fact, they were so gorgeous that I felt compelled to tweet about them :


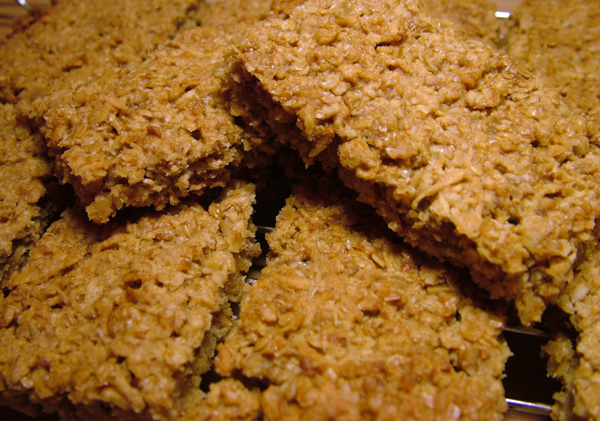
They really were absolutely lush so I decided that I'd have a go at making my own.  I just adapted a normal flapjack recipe and I thought I'd post it here in case you fancied trying them too.  They're nice and crumbly and not too sweet and in the words of Tesco they're 'Perfect With A Cuppa'.(Have you noticed that they print that on almost every product in their bakery section?)


Apple & Cinnamon Flapjacks (AKA Stablefordjacks)

Ingredients

250g Porridge oats
125g Unsalted butter
75g Demerara sugar
3 Tablespoons golden syrup
1-2 Teaspoons ground cinnamon (I used two because I love cinnamon)
2 Dessert apples

Method

Preheat your oven to 180°C (160°C for fan ovens) and line a shallow tin (about 20cm x 20cm) with baking paper.

Gently heat the butter, sugar and syrup in a saucepan until the butter is melted and all the sugar has dissolved. 

Add the oats and cinnamon and stir in.

Peel and grate the apples and stir them in too.

Put the mixture into the lined tin, spread it out and press flat with the back of a spoon.

Bake in the oven for about 30-40 minutes until they're a light golden brown.

Remove from the oven and leave in the tin to cool for about twenty minutes.  Lift out of the tin and cut into bars or squares.

Enjoy!

Tuesday, 24 March 2009

Vanilla Cupcake Recipe

CupcakesA few of you have asked for the recipe that I use to make my basic vanilla cupcakes so here you go. This recipe will make about a dozen cupcakes.

Basic Vanilla Cupcake Ingredients

For the cakes
4 oz (110 g) Self raising flour
4 oz (110 g) Caster sugar
4 oz (110 g) Unsalted butter
1 tsp Baking powder
2 Large free range eggs
1 tsp Vanilla extract

For the buttercream
5 oz (140 g) Unsalted butter
10 oz (280 g) Icing sugar
Food colouring (Optional)


Method

1. Preheat the oven to 160°C / 325°F / Gas mark 3. Don't forget that all ovens vary so you may need to adjust the temperature and cooking time accordingly.


2. Line a cake or muffin tray with your paper cake cases.

3. Mix the butter with an electric whisk until it is light in colour.

4. Add the sugar and whisk again until soft and fluffy.

5. Add the eggs and the vanilla and mix again.

6. Sieve the flour and baking powder into your bowl and mix one more time.

7. Divide the mixture between the cake cases and bake in the oven for about twenty minutes. The cakes are cooked when they are golden brown and they spring back when touched. Place the cakes on a wire rack to cool.

8. To make the buttercream whisk the soft butter and gradually add the icing sugar a bit at a time. Add some colour if you fancy it and mix well. Fill a piping bag fitted with a large star nozzle with the buttercream and pipe a swirl of it on top of each cake. Decorate as you wish!

Tips

~ Take the butter out of the fridge to soften for an hour or so before you start baking.

~ I use golden caster sugar. I prefer the flavour of it to standard caster sugar.

~ Use Lurpak unsalted butter for the buttercream. It's a nice pale colour.

~ Try cutting out a small piece of cake from each cupcake and fill the 'well' that is left with jam or lemon curd. Replace the little bit of cake you removed before icing.

~ When adding food colouring to the buttercream use a cocktail stick to transfer the colour to the buttercream. You only need a little touch as the colour goes a long way.

~ There are endless ways to decorate your cakes. Visit your local sugarcraft shop if you're lucky enough to have one nearby or check the baking aisle of your supermarket for lots of decorations and icingy things. Have a look at this wonderful website for inspiration and supplies.

~ Make sure you eat any leftover cake mix and lick any spoons and spatulas clean. (And yes, I know cake mix has got raw eggs in it but I've been eating cake mix since I was about three and it's never done me any harm!)

Saturday, 17 January 2009

Oat Biscuits

Homemade Oat BiscuitsThis is my three hundredth post. Yes, I've published three whole hundred posts full of beads and waffle. Yay me! I'm celebrating with a cup of tea and one (or two) of these homemade oat biscuits. They're like flapjacks in crunchy cookie form. Yum!

Here's the recipe for them (as requested by Sue) :

Oat Biscuits
Makes approximately 24

Ingredients
150g (6oz) Porridge Oats
150g (6oz) Self Raising Flour
150g (6oz) Caster Sugar
150g (6oz) Butter
2 Tablespoons Golden Syrup
2 Tablespoons Milk

Method
1. Heat butter, syrup and milk in a saucepan until butter is melted.
2. Pour into a bowl containing the oats, flour and sugar and mix together.
3. Roll heaped-teaspoon-sized amounts of the mixture into balls and place on a baking tray lined with baking paper. Space them well as the mixture will double in size.
4. Bake in batches at 180°C (160°C for fan ovens) for about 10-12 minutes or until golden brown.
5. Leave biscuits on baking tray for five minutes before transferring to a cooling rack.