Showing posts with label Dots. Show all posts

Saturday, 6 March 2021

More dottiness and some new tools

Handmade lampwork glass big hole beads by Laura Sparling

Remember the green and lavender bead from the last post? well, it turned out like this. I really love that mossy, slightly yellow green against the lavender colour. Definite springtime vibes.

Handmade lampwork glass big hole beads by Laura Sparling

I'm still making big hole dotty beads.

Handmade lampwork glass big hole beads by Laura Sparling

I think some of them are a bit too large for bracelet charms but they will work nicely just strung on a chain, and of course jewellery makers can turn them into pendants. One of my favourite pendants is one that I made with an Akihiro Okama big hole tombodama bead. I must photograph it and show you.

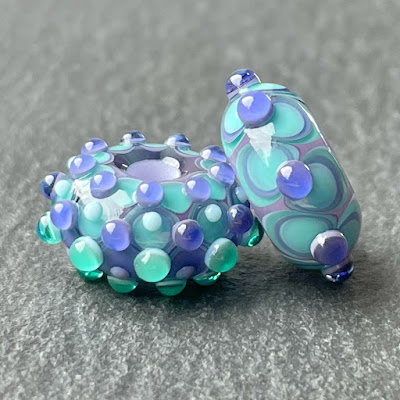
But yes, dotty big hole beads. Some of them have so many dots. The one on the left in the photo below has 288 dots in total. That's a lot, right?

Handmade lampwork glass big hole beads by Laura Sparling

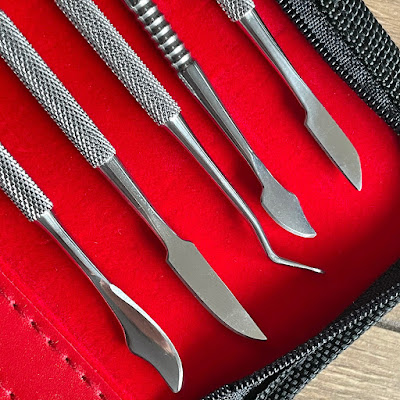
Those raised dots are made up of an opaque dot which I flatten with a tool before I add another dot of transparent glass. I've always flattened my dots with the paddle of one of those pairs of tiny tweezer mashers that I've had in my tool arsenal forever. Thing is, even though the mashing paddle area is only about 7mm x 10mm, this is a tad too big when you're working as small as I do and sometimes I can't flatten one dot without the paddle accidentally touching another dot. For as long as I've been lampworking I've always intended to buy a set of stainless steel sculpting tools and this week I finally got round to it.

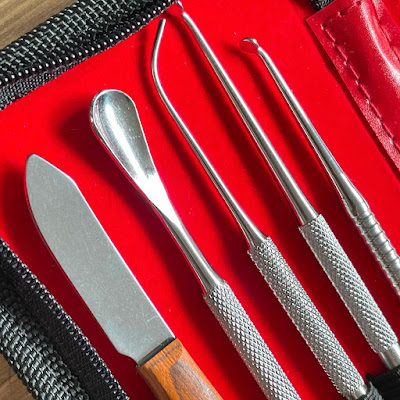
Stainless steel sculpting tool set

They look a bit scary and surgical, don't they? Some of them have pretty sharp blade parts which will be very useful for making indentations.

Stainless steel sculpting tool set

There's a good selection of poker-prodders and some lovely ones that end in a tiny paddle shape about 3mm to 4mm wide which is just what I needed to flatten my dots.

Stainless steel sculpting tools

That one that's second from the left in the photo below will also double up as a tiny spoon for eating tiny puddings, so that's handy. 

Stainless steel sculpting tool set

I bought the set of tools from Amazon for £15.99. Happy with that. The tools are really high quality and they come in a lovely little case.

In crochet news I've completed all 144 squares of my Aria Blanket and I'm now working on the border.

Attic24 'Aria' blanket in progress

I was feeling quite sad about nearing completion of the blanket as it has been an utter joy to work on but my sister fell in love with it when I posted it on my Instagram stories, so I offered to make her one. I'm really pleased that I get to crochet all that colour and cosiness all over again. Hurrah!

Don't forget the necklace prize draw if you've not entered it already. I'll be drawing a winner tomorrow night so head on over to throw your name into the hat.

Monday, 1 March 2021

Spring things and bead things

Daisy

I keep seeing people posting photos of springtime flowers emerging - lovely crocuses, daffodils and grape hyacinths and the like. Every year I mean to plant bulbs and corms like that but I never do.

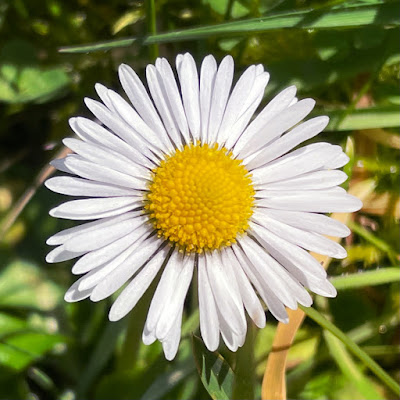
Daisy

I've got naff all in my back garden except for daisies. That's okay, though, because I flipping adore daisies. They're just little flowers of sheer perfection.

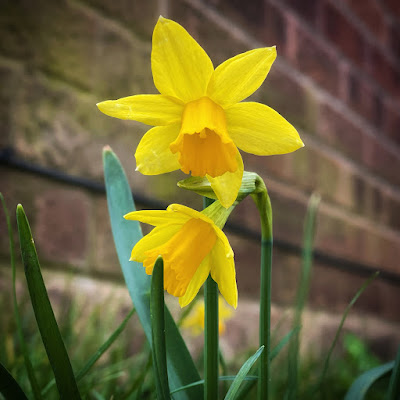
This morning I noticed that a couple of little daffodil things have sprouted out in the front garden, though. 

Little daffodil things

A few years back I bought one of those cheapo cardboard tubs of little daffodils that they sell in Tesco Express. When the flowers went over I planted the bulbs out the front thinking "Well, you've got two options; you can live or die" and every year since a couple of little yellow flowers have emerged. I always forget that they're there so when they pop their heads up I'm always "Oh yeah! I remember you!" at them.

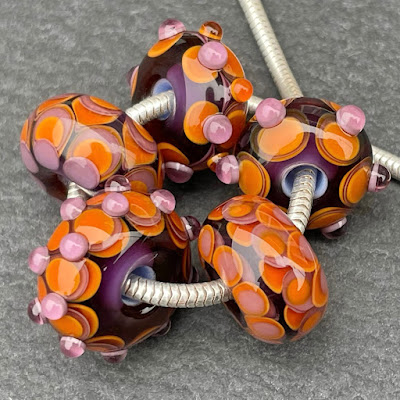
Handmade lampwork glass big hole beads by Laura Sparling

In bead news, I made a couple more orange and purple big hole ones yesterday. I'm not sure about one of them (the one in the bottom right) but it might just be me being super-critical of my own work. I'll give it a couple of days and see what I think. Sometimes I think a bead has dot placement issues and when I go back to it a day or so later I can't actually see the problem that I was initially concerned about.

I'm really pleased with the one in the centre of that strand, though. This one:

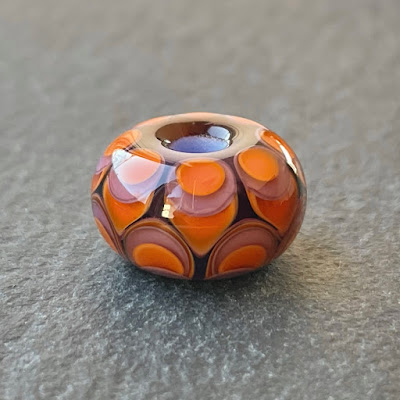
Handmade lampwork glass big hole bead by Laura Sparling

He's about 20mm diameter x 9mm and he has many many dots. Lots of breath-holding and careful melting-in required during its making.

Handmade lampwork glass big hole bead by Laura Sparling

I made more dotty big hole beads today, this time in lavender bush kind of colours.

Glass stringers

Handmade lampwork glass big hole bead by Laura Sparling

The bead in the photo is still hot so those aren't its true colours. I'm looking forward to seeing what the bead looks like when it's cool.

Don't forget to enter my prize draw. Right now there are only seven entries so the odds of winning the heart necklace are pretty good! I knew this would happen. People are so over blogs. Social media has made it effortless for people to interact by whacking a like on this or posting an emoji on that, and it's made us lazy. I didn't want to do a giveaway on Instagram because it's too easy. "Like this post to enter!" or "Like and tag a friend to enter!" giveaways are far too simple. People end up entering things just because they're there. Doing a blog giveaway takes a couple more clicks and some actual typing, so this way I know that people are entering my prize draw because they really want to. If you've joined in, thank you!

Saturday, 27 February 2021

Dotty

Handmade lampwork glass big hole charm bead by Laura Sparling

You know how last post I said that when I go down to the shed I just see what happens beadwise? Well, yesterday's beads are a good illustration of that. I had no idea what colours I was going to work with so I just selected one of my favourite colour combinations – purple and orange – and I pulled a few stringers and just sat and made.

Handmade lampwork glass big hole charm bead by Laura Sparling

I ended up arranging and stacking dots which is one of my favourite lampworking things. Whenever I start one of these beads I never know how it's going to end up. I make it up as I go along and there is something very zen about watching the dots move as they fight for space on the surface of the bead. Circles push themselves into rounded rectangles, triangles and petal shapes, and dding more dots distorts them further still.

Handmade lampwork glass big hole charm bead by Laura Sparling

Before you know it, half an hour has slipped by and a very groovy looking bead has been born.

Handmade lampwork glass big hole charm bead by Laura Sparling

I also made a couple of beads that have raised bumps.

Handmade lampwork glass big hole charm beads by Laura Sparling

These are asymmetric and the first one I almost abandoned because I thought it was too asymmetric. I couldn't think how anyone would like it or want to use or wear it, but something stopped me from plunging it into the water jug and I made another unbalanced one and resolved to see what they would look like together.

Handmade lampwork glass big hole charm beads by Laura Sparling

I'm calling them the 'Odd Couple' because they work as a mismatched pair. On their own each one looks like a weird little alien spacecraft but together they look quite happy and harmonious.

Handmade lampwork glass big hole charm beads by Laura Sparling

The beads all have 4mm holes and they'll be available in my next shop update. I don't quite know when that will be but keep an eye on my Instagram or sign up to my mailing list and I'll let you know.

I was going to make more beads today but I decided to have a crochet day instead.

Crocheting a granny square

I'm two thirds of the way with the squares now. The best bit about making a blanket is when it reaches a considerable size and it starts acting all blankety while you're working on it. Cosy knees!

Tuesday, 9 February 2010

Mini Tutorial : Wiggledot Bead

This mini tutorial shows you how I make one of my Wiggledot beads. This is quite an easy bead to make but it does offer you a host of design possibilities because you can alter the dot placement, the number of dots, the colours and so on.

Step 1


Make a donut-shaped bead. Remember to start off quite a bit smaller than you want the finished bead to be as you'll be adding quite a lot of glass to your base bead.


Step 2


Apply a band of stringer around the middle of the bead. Different stringer sizes will produce different effects. Don't go too fine with the stringer though or you'll hardly see it.


Step 3

Melt the stringer band in so it is flush with the surface of the bead and then add four dots, evenly spaced, around the left hand side of the bead. These dots need to be quite large and most importantly they need to be the same colour as your base bead. Don't let the dots touch the stringer band.


Step 4

Add another four dots to the right hand side of the bead so that they're offset from the first four.


Step 5

Melt all of the dots in slowly and gradually so that they don't distort. Bring your bead out of the flame and let the glow subside from time to time if needs be.


Step 6

You should now have a plain bead with a pretty wiggly line around its centre. This was caused by the dots pushing the stringer out of shape as they melted into the surface.


Step 7

Using a different colour add another eight dots, just as you did in steps three and four. You might want to make them smaller than last time. Then melt them in slowly and gradually.


Step 8

Repeat step seven using a different colour. I'm using Efftere transparent dark teal.


Step 9

If you like you can add more dots on top of the last ones .....


Step 10

..... and even a few more if the mood takes you! Remember that the more dots you add the more your wiggly line will wiggle and the bigger your bead will be.


Step 11

The finished bead.


Hints & Tips

~ You can use either a transparent or opaque base for this style of bead.
~ Try using Goldstone (Aventurine) stringer for the wiggly line.
~ More than eight initial dots will create more of a wiggly line.
~ Plunge and case your dots for that groovy trapped bubble effect.
~ Leave some of your dots raised for texture.


If you make any Wiggledot beads with the aid of this tutorial please
email me some photos of them - I'd love to see!